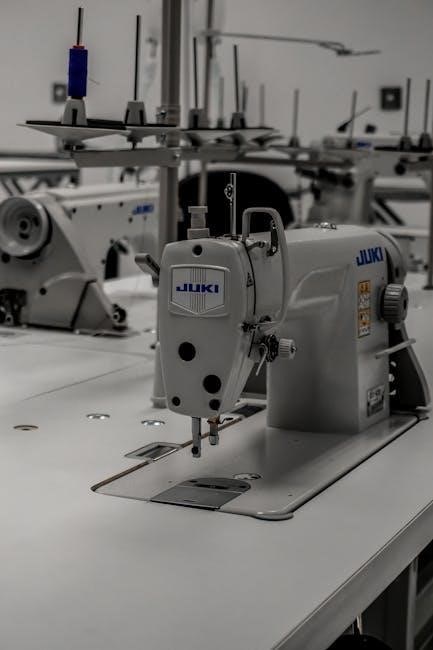
singer sewing machine troubleshooting manual
Thread-Related Issues
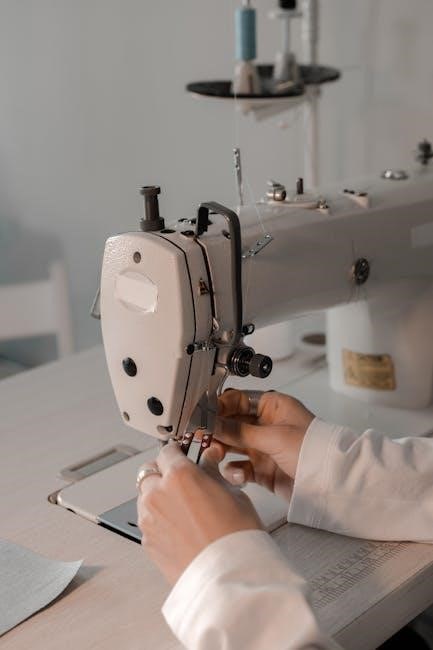
Common thread issues include improper threading, tension problems, or thread breakage. Ensure the upper thread is correctly seated in the take-up lever and tension discs. If the lower thread is too tight or loose, adjust the bobbin tension. Always use the correct thread type for your fabric and check for tangles or knots. Regularly clean the machine to prevent thread buildup and ensure smooth stitching.
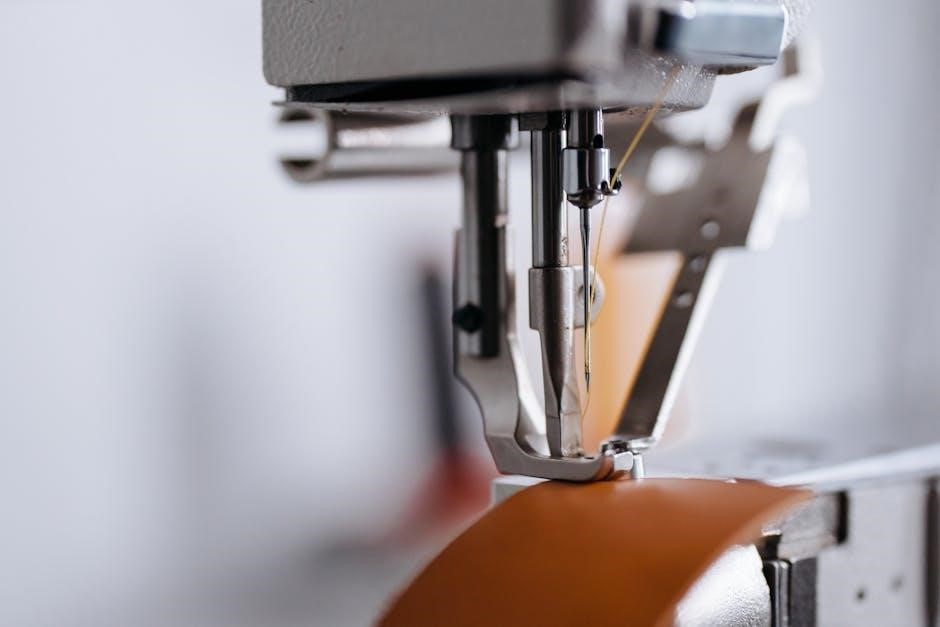
1.1. Upper Thread Not Threading Correctly
If the upper thread is not threading properly, it may cause loops or skipped stitches. Ensure the thread path is clear and the take-up lever is in the correct position. Gently pull the thread to check for proper tension and seating in the tension discs. If issues persist, rethread the machine, following the manual’s guidance, and verify that the thread is not tangled or knotted before use.
1.2. Lower Thread Tension Issues
Incorrect lower thread tension can lead to uneven stitches or fabric puckering. Check the bobbin for proper seating and ensure the bobbin case is correctly aligned. If tension is too tight, loosen the bobbin screw slightly. If too loose, tighten it. Test the tension by gently pulling the thread; it should offer some resistance but not break. Adjust as needed for balanced stitch formation on both fabric sides.
Stitch-Related Problems
Stitch issues like skipped stitches, uneven stitching, or inconsistent stitch length can arise from incorrect tension, wrong needle size, or improper machine setup. Always check thread tension and ensure the needle is suitable for your fabric type. Regular maintenance and proper threading can help prevent these common stitching problems;
2.1. Skipped Stitches
Skipped stitches occur when the needle fails to penetrate the fabric or form a loop. This is often due to a dull, bent, or incorrect needle type for the fabric. Ensure the needle is sharp and suitable for your material. Check thread tension; if too tight or loose, it can cause misalignment. Verify stitch length and width settings are appropriate for the fabric. Regularly clean and oil the machine to maintain smooth operation. Always refer to the manual for specific guidance on adjusting settings for your Singer model.
2;2. Loose or Tight Stitches
Loose or tight stitches are often caused by incorrect thread tension. Check the upper and lower thread tension settings and adjust them to the recommended levels for your fabric type. Ensure the bobbin is properly seated and the thread is not tangled. If stitches remain uneven, clean the machine thoroughly and oil the parts as needed. Refer to your Singer manual for specific tension guidelines to achieve balanced stitching.
Needle-Related Troubleshooting
Needle issues often arise from improper insertion, bending, or using the wrong type. Always insert the needle correctly, with the flat side facing the correct direction. Use the right needle size and type for your fabric to prevent bending or breaking. Regularly inspect and replace dull or damaged needles to maintain smooth stitching and avoid fabric damage. If issues persist, consult a professional.
3.1. Needle Bending or Breaking
Needle bending or breaking is often caused by using the wrong needle size, incorrect insertion, or sewing through thick fabrics. Always ensure the needle is properly aligned and seated. Using a dull or damaged needle can also lead to breakage. Regularly inspect needles for wear and replace them as needed. Avoid sewing over pins or heavy fabric layers, as this can cause unnecessary stress on the needle.
3.2. Incorrect Needle Insertion
Incorrect needle insertion can cause thread loops, skipped stitches, or machine jamming. Always ensure the needle is fully seated and aligned with the needle bar. The flat side of the needle should face the correct direction (check your manual). Tighten the needle clamp screw firmly but avoid over-tightening. If the needle is inserted improperly, remove it and reinsert it following the manufacturer’s guidelines to ensure proper function and prevent damage.
Bobbin and Thread Breakage
Common issues include thread bunching, incorrect bobbin winding, or improper tension. Ensure the bobbin is correctly wound, thread isn’t tangled, and tension is adjusted properly.
4.1. Bobbin Thread Breaking
Bobbin thread breaking often results from incorrect tension, improper winding, or using low-quality thread. Ensure the bobbin is wound evenly and not overfilled. Check for thread tangles or knots. Adjust the bobbin tension according to the machine’s guidelines. Using the correct thread type for your fabric and maintaining regular machine cleaning can prevent frequent thread breakage. Replace the bobbin if it’s damaged.
4.2. Thread Shedding
Thread shedding occurs when the thread frays or unravels during sewing, often due to poor thread quality or improper tension. Use high-quality threads suitable for your fabric type. Adjust the upper and lower thread tensions to prevent excessive friction. Regularly clean the machine to remove lint and debris that may cause thread wear. Ensure the needle is sharp and correctly inserted to minimize thread stress.
Tension and Fabric Feeding Issues
Incorrect thread tension can cause uneven stitches or fabric pulling. Ensure the presser foot is lowered to guide fabric smoothly. Adjust tension settings as needed.
5.1. Incorrect Thread Tension
Incorrect thread tension is a common issue that can cause uneven stitching or fabric bunching. Check that the upper thread is properly seated in the tension discs. If stitches are too tight, loosen the tension; if too loose, tighten it. Ensure the bobbin thread tension is balanced to avoid puckering or loose fabric. Always test tension on a scrap fabric before sewing your project to achieve consistent results.
5.2. Fabric Not Feeding Properly
Fabric not feeding properly can disrupt stitching. Ensure the presser foot is lowered before sewing, as this engages the feed dogs. Check if the feed dogs are in the “up” position, as they must move to advance fabric. If fabric still doesn’t feed, verify that the stitch length is not set to zero, which disables fabric movement. Clean or oil the feed dogs if they seem sluggish or stuck.

Machine Noise and Vibration
Excessive noise or vibration may indicate improper machine setup or maintenance. Ensure the bobbin area is clean and well-lubricated, and check for loose screws or parts.
6.1. Unusual Noise During Operation
Unusual noise during operation can be caused by lint buildup, incorrect needle size, or improper threading. Check for loose parts, ensure the bobbin is correctly seated, and verify that the needle is appropriate for the fabric. Clean the machine regularly, especially the bobbin area, to prevent debris from causing friction. If noises persist, consult the manual or consider professional servicing to avoid further damage.
6.2. Excessive Vibration
Excessive vibration can be caused by an unbalanced machine, improper needle installation, or lint buildup in the bobbin area. Ensure the machine is placed on a stable surface and check for loose screws. Verify that the bobbin is correctly seated and the needle is appropriate for the fabric. Regular cleaning and lubrication of moving parts can reduce vibration. If the issue persists, consult a professional to prevent further mechanical damage.
Maintenance and Care Tips
Regularly clean the machine, oil moving parts, and check for lint buildup. Use a soft brush to remove debris and ensure all components function smoothly.
7.1. Regular Cleaning
Regular cleaning is essential to maintain your Singer sewing machine’s performance. Use a soft brush to remove lint and debris from the bobbin area, tension discs, and stitch plate. Turn the handwheel to access the hook area and clean thoroughly. Avoid using liquids or harsh chemicals, as they may damage the machine’s finish or internal components. Cleaning ensures smooth stitching and prevents thread breakage.
7.2. Lubrication
Proper lubrication keeps your Singer sewing machine running smoothly. Use high-quality sewing machine oil to lubricate moving parts, such as the needle bar, hook race, and tension discs. Apply a few drops to the recommended areas, as specified in the manual. Avoid over-lubricating, as excess oil can attract lint and cause maintenance issues. Regular lubrication prevents friction and ensures consistent stitch quality and machine longevity.
When to Seek Professional Help
Consult a professional if issues persist after troubleshooting. Complex mechanical failures or internal damage require expert repair to avoid further damage and ensure proper machine function.
8.1. Persistent Issues After Troubleshooting
If problems like thread looping, skipped stitches, or noise persist despite basic fixes, it may indicate deeper mechanical issues. Check for internal damage or misalignment in the take-up lever or bobbin area. If adjustments and cleaning don’t resolve the issue, professional servicing is recommended to prevent further damage and restore optimal performance.
8.2. Complex Mechanical Failures
Complex mechanical failures, such as gear misalignment or motor malfunctions, often require professional attention. If unusual noises, inconsistent stitching, or complete stoppage occur despite basic troubleshooting, consult a certified technician. DIY repairs can worsen damage, so avoid attempting internal adjustments without expertise; Regular servicing can prevent such issues, ensuring your Singer sewing machine operates smoothly and reliably over time.

Preventive Measures
Regularly clean and lubricate your Singer sewing machine to maintain performance. Use appropriate needles and threads for specific fabrics to prevent damage. Store the machine in a dry, clean environment and follow the manufacturer’s maintenance schedule to ensure longevity and optimal functionality. Proper care reduces the risk of mechanical issues and extends the machine’s lifespan, ensuring consistent stitching and reliable operation.
9.1. Proper Threading Techniques
Proper threading is essential for smooth operation. Always thread the machine with the presser foot raised to ensure the thread seats correctly. Follow the threading path guides on the machine, keeping the thread taut but not overly tight; Use the correct thread type for your fabric and avoid crossing or twisting the thread. Regularly inspect for thread damage or tangles. Proper threading prevents issues like skipped stitches, thread breakage, and uneven tension, ensuring consistent stitching quality and machine performance.
9.2. Using the Correct Needle and Thread Type
Using the right needle and thread type is crucial for optimal performance. Choose needles based on fabric thickness—sharp for woven fabrics, blunt for knits. Select thread weight and material to match your fabric, ensuring compatibility; Avoid using damaged or dull needles, as they can cause skipped stitches or thread breakage. Always check thread and needle condition before sewing and refer to your manual for recommendations to ensure smooth stitching and prevent common issues.