ice cream ball instructions
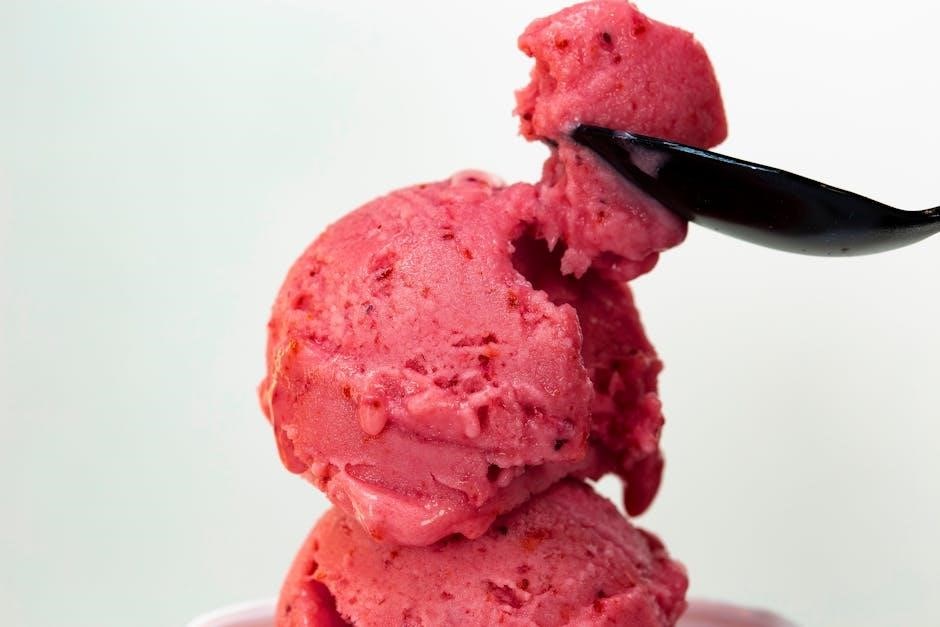
The ice cream ball offers a fun, portable way to craft homemade ice cream by rolling and shaking, perfect for outdoor adventures or family gatherings, creating a unique and interactive dessert experience.
What is an Ice Cream Ball?
An ice cream ball is a unique, portable kitchen device designed to make homemade ice cream through a fun, interactive process. It features two chambers: one for the ice cream mixture and another for ice and rock salt. By rolling, shaking, or tossing the ball, the mixture churns and freezes, creating creamy ice cream. Lightweight and durable, it’s perfect for outdoor activities, family gatherings, or camping, offering a hands-on way to enjoy a sweet treat.
Why Use an Ice Cream Ball?
An ice cream ball is a fun and interactive way to create homemade ice cream. It’s portable, making it ideal for outdoor adventures, camping trips, or backyard fun. The process of rolling and shaking the ball engages everyone, turning ice cream making into a playful activity. It’s also a unique alternative to traditional ice cream makers, offering a hands-on experience that’s both educational and entertaining for all ages, while producing a deliciously creamy treat.
Key Benefits of Making Ice Cream with a Ball
Making ice cream with a ball offers numerous benefits, including the ability to customize flavors and ingredients to suit your taste. It’s a fun, hands-on activity that engages everyone, fostering creativity and bonding. The ball is lightweight and portable, making it perfect for outdoor adventures or parties. Additionally, using fresh, high-quality ingredients ensures a healthier treat compared to store-bought options. The process is also cost-effective and environmentally friendly, as it eliminates the need for disposable containers or energy-consuming appliances.

Gathering Ingredients and Equipment
Gathering the right ingredients and equipment is essential for making ice cream with a ball. You’ll need heavy cream, sugar, vanilla extract, and your preferred flavorings. The ice cream ball is the primary tool, but additional items like a mixer, measuring cups, and a bowl are also necessary. Ensure all components are ready before starting the process for a smooth and enjoyable experience.
Essential Ingredients for Ice Cream
To make delicious ice cream using a ball, you’ll need basic ingredients like heavy cream, whole milk, granulated sugar, and vanilla extract for flavor. These form the creamy base. For added taste, consider mix-ins such as fresh fruit, chocolate chips, nuts, or cocoa powder. Ensure all ingredients are fresh and of high quality to achieve the best texture and flavor. Optional additions like salt or liqueurs can enhance the taste, while mix-ins provide texture and variety to your homemade ice cream creation.
Necessary Equipment: The Ice Cream Ball
The ice cream ball is a unique, portable device designed specifically for making homemade ice cream. It consists of two chambers: one for the ice cream mixture and another for ice and rock salt. The ball is durable, lightweight, and easy to use, making it perfect for outdoor activities like camping or backyard fun. Simply add your ingredients, seal the ball, and roll or shake it for about 20 minutes to churn the ice cream. It’s a fun and interactive way to create your favorite frozen treats!
Additional Tools for Preparation
Besides the ice cream ball, you’ll need a few basic tools for preparation. A large bowl or container is essential for mixing your ice cream ingredients. Measuring cups and spoons ensure accurate proportions. A whisk or hand mixer helps combine the mixture smoothly. A plastic or metal scoop is handy for portioning. An airtight container is useful for storing leftovers. Towels and a plastic wrench (provided with some balls) are also helpful for handling and cleanup. These tools make the process efficient and enjoyable.
Preparing the Ice Cream Mixture
Combine heavy cream, sugar, and vanilla extract in a bowl until smooth. Add flavorings or mix-ins as desired, ensuring a consistent texture for optimal churning results later.
Basic Ice Cream Recipe
A simple yet essential recipe for homemade ice cream involves combining 2 cups of heavy cream, 1 cup of granulated sugar, and 1 teaspoon of vanilla extract in a bowl. Whisk the mixture until the sugar is fully dissolved, ensuring a smooth consistency. This base recipe can be customized with various flavorings or mix-ins to suit your taste preferences. Pour the prepared mixture into the ice cream ball and seal it tightly before proceeding with the churning process for a creamy, delicious treat.
Adding Flavorings and Mix-Ins
Enhance your ice cream by adding flavorings like cocoa powder for chocolate, melted caramel for a swirl, or extracts such as mint or almond. Mix-ins like fresh fruit, nuts, or candy pieces can be gently folded into the base mixture before churning. For larger mix-ins, fold them in just before transferring the mixture to the ice cream ball. Ensure all additions are evenly distributed for a consistent flavor and texture throughout the ice cream. This step allows for endless customization to suit your taste preferences.
Ensuring the Mixture is Ready for Churning
Before churning, ensure your ice cream mixture is well-mixed and chilled. Pour the mixture into the inner chamber, leaving space for expansion. Cover it with plastic wrap to prevent ice crystals from forming. If using mix-ins, fold them in gently. A smooth, even consistency is key for optimal churning; Avoid overmixing, as it can introduce air bubbles. Once prepared, seal the chamber tightly to prevent leaks during the rolling process. Proper preparation ensures a creamy, even-textured ice cream with consistent flavor distribution.
Assembling and Using the Ice Cream Ball
Fill the inner chamber with your prepared ice cream mixture, seal tightly, then add ice and rock salt to the outer chamber. Shake or roll the ball vigorously for about 20 minutes to churn the ice cream until it reaches your desired consistency. This hands-on method makes the process fun and engaging for everyone involved, perfect for outdoor activities or family gatherings.
Filling the Inner Chamber with the Ice Cream Mixture
Pour your prepared ice cream mixture into the inner chamber of the ball, ensuring not to overfill it. Secure the lid tightly to prevent leakage during shaking. For best results, use a funnel to avoid spills and make sure the mixture is well-mixed before adding it to the chamber. This step is crucial as it sets the foundation for the churning process. Always double-check the seal to avoid any leaks while rolling or shaking the ball.
Adding Ice and Rock Salt to the Outer Chamber
Fill the outer chamber with ice and add rock salt, creating a brine solution that lowers the temperature. Secure the chamber tightly to prevent leaks. The ice and salt mixture chills the inner chamber, allowing the mixture to churn into ice cream. Shake the ball vigorously for about 20 minutes to ensure proper churning. This step is essential for achieving the right consistency and texture in your homemade ice cream.
Sealing the Ball Properly
Sealing the ice cream ball correctly is crucial to prevent leaks and ensure even freezing. Hand-tighten the ball firmly, avoiding excessive force that could damage the mechanism. Use the provided plastic wrench only to open the ball, as other tools may cause wear. Double-check the seal before shaking or rolling to ensure no ingredients escape. Proper sealing guarantees efficient churning and a smooth, creamy texture in your homemade ice cream.
Shaking and Rolling the Ball
Vigorously shake and roll the ice cream ball for about 20 minutes to churn the mixture. Roll it on a flat surface, spin it, or toss it gently to ensure even freezing. The motion mimics traditional churning, breaking down ice crystals for a smooth texture. Keep moving the ball consistently to prevent ingredients from settling. After 20 minutes, the ice cream should be ready to scoop and enjoy, with a creamy consistency achieved through this fun, interactive process.
Safety Tips and Precautions
Handle the ice cream ball carefully to avoid damage. Avoid dropping or throwing it on hard surfaces. Use the plastic wrench only for opening, and supervise children during use to prevent accidents.
Handling the Ball Safely
Always handle the ice cream ball with care to avoid damage. Avoid dropping or throwing it on hard surfaces, as this can cause cracks or breaks. Use the provided plastic wrench only for opening and closing the ball, as other tools may damage the seal. Keep the ball away from extreme temperatures and sharp objects. Supervise children during use to ensure proper handling and prevent accidents. Regularly inspect the ball for any signs of wear or damage before use.
Preventing Leaks and Damage
To prevent leaks, ensure all compartments are tightly sealed before use. Avoid over-tightening, as this can damage the ball’s mechanisms. Never use harsh chemicals or abrasive cleaners, as they may harm the materials. Store the ball in a cool, dry place and avoid exposing it to extreme temperatures. Regularly inspect for wear and tear, and replace any damaged parts promptly. Wipe down the ball with a soft cloth after use to maintain its condition.
Supervising Children During Use
Always supervise children when using the ice cream ball to ensure safe handling. Teach them to avoid dropping or throwing the ball, as it may cause damage or injury. Demonstrate proper rolling and shaking techniques to prevent accidental slips. Encourage gentle handling and explain the importance of keeping the ball upright to avoid spills. Supervision helps children understand safety guidelines and enjoy the process responsibly, fostering a fun and educational experience for all ages.

Creative Ideas for Serving
Transform your homemade ice cream into a visually appealing dessert by coating it in chocolate, nuts, or fruit. Use the ball for outdoor treats or as a unique serving vessel for parties, adding a playful twist to any gathering with customizable toppings and flavors, making every serving a delightful and memorable experience for guests of all ages.
Coating Ice Cream Balls with Toppings
Coating ice cream balls with toppings adds texture and flavor. Use crushed nuts, chocolate shavings, or fresh fruit for a decorative touch. For a crunchy coating, roll the ice cream in crushed cereal or graham crackers mixed with a bit of sugar. To achieve a professional look, dip the balls in melted chocolate and sprinkle with toppings before freezing. This creative step transforms simple ice cream into a visually appealing dessert perfect for special occasions or family treats.
Using the Ice Cream Ball for Outdoor Activities
The ice cream ball is perfect for outdoor adventures, offering a fun and portable way to make ice cream on the go. Ideal for camping trips, picnics, or backyard gatherings, it allows you to create fresh, creamy treats anywhere. Simply fill the ball with your ingredients and ice, then roll and shake it while enjoying nature. This interactive process makes it a delightful activity for both kids and adults, ensuring everyone can enjoy a cool, homemade dessert in the great outdoors.
Storing Leftover Ice Cream
To maintain the freshness of leftover ice cream, transfer it to an airtight container and store it in the freezer at 0°F or below. For ice cream balls, place them in a sealed container or plastic bag to prevent ice crystals from forming. Coated ice cream balls can also be stored this way, preserving their texture and flavor. Label and date the container for easy reference. Leftover ice cream typically stays fresh for up to three days when stored properly.

Tips and Tricks
Mastering the art of ice cream ball use involves a few key tips for optimal results. Always use hot water for scooping and avoid kicking the ball to prevent damage. Proper sealing ensures even freezing, while regular cleaning maintains hygiene. Experiment with flavors and chilling times for the best texture. These simple tricks enhance your ice cream-making experience and keep your ball in great condition for future use.
Ensuring the Best Flavor and Texture
For optimal flavor and texture, use high-quality ingredients and ensure the mixture is well-balanced. Avoid over-churning, as it can lead to ice crystals, and under-churning, which results in a soft texture. Keep ingredients chilled before churning to achieve a smoother consistency. Experiment with flavorings but avoid over-sweetening. Incorporate air during churning for creaminess but avoid excessive aeration. Age the mixture if possible to enhance flavor depth. Consistent churning and proper use of rock salt are key for the best results.
Common Mistakes to Avoid
When using an ice cream ball, avoid overfilling the inner chamber, as it can lead to leaks during churning. Using too much salt or not enough ice can result in improper freezing. Don’t over-churn, as it can make the ice cream too hard. Avoid using low-quality ingredients, as they affect flavor and texture. Don’t skip aging the mixture, as it enhances flavor depth. Also, refrain from handling the ball roughly, as it can cause damage. Ensure proper sealing to prevent leaks and maintain even churning for the best results.
Cleaning and Maintaining the Ice Cream Ball
After each use, rinsing both chambers with warm water is essential to remove any residue. Use mild soap and a soft sponge to clean the interior and exterior. Avoid abrasive cleaners or scrubbers, as they may damage the surface. Dry the ball thoroughly to prevent mold or bacterial growth. Regularly inspect for wear and tear, and replace any damaged parts. Proper maintenance ensures the ball remains hygienic and functional for future use, preserving its longevity and performance.
Making ice cream with a ball is a fun and creative process that brings joy to both kids and adults. This method combines playfulness with practicality, allowing everyone to enjoy homemade treats anywhere, anytime. By following the simple steps and tips outlined, you can create delicious, customizable ice cream while making lasting memories. Whether at home or on an adventure, the ice cream ball is a perfect tool for sweet, shared experiences.