
hip replacement exercises after 6 weeks pdf
Following a total hip replacement‚ progressing to exercises around six weeks post-surgery is crucial for regaining strength‚ mobility‚ and function.
This phase focuses on stretching‚ strengthening‚ endurance‚ and balance‚ building upon earlier rehabilitation efforts for optimal recovery and a healthy lifestyle.
Understanding the 6-Week Milestone
Reaching the six-week mark post-hip replacement signifies a pivotal transition in your rehabilitation journey. Initially‚ the focus was on wound healing and reducing immediate post-operative discomfort. Now‚ with improved healing‚ you can progressively increase the intensity and complexity of your exercises.
This stage isn’t a definitive endpoint‚ but rather a stepping stone towards long-term hip health. While precautions advised by your surgeon remain important‚ the 6-week milestone allows for a shift from primarily protective movements to actively rebuilding strength and range of motion.
Consistent therapy‚ as highlighted in rehabilitation guides‚ is vital during this period. It addresses swelling‚ pain‚ and aims to improve balance and endurance‚ enabling a return to daily activities and potentially even sedentary work within a reasonable timeframe.
Goals of Exercise After 6 Weeks
The primary goals of exercise beyond the six-week post-hip replacement mark center around restoring optimal hip function and enabling a return to a fulfilling lifestyle. This includes maximizing strength in the muscles surrounding the hip – glutes‚ quadriceps‚ and hamstrings – to support joint stability and movement.
Improving range of motion is also crucial‚ allowing for greater flexibility and ease of movement in daily activities. Simultaneously‚ enhancing endurance builds stamina for prolonged activity‚ while balance and proprioception exercises minimize fall risk.
Ultimately‚ the aim is to create a sustainable home exercise program‚ performed two to three times weekly‚ to maintain these gains and promote long-term hip health. Regular follow-up appointments are essential to monitor progress and adjust the program as needed.

Warm-up Exercises

Begin each session with gentle movements to prepare muscles for activity‚ reducing injury risk and improving exercise effectiveness. Prioritize range of motion and low-impact cardio.
Gentle Range of Motion Exercises
Initiate your warm-up with controlled‚ pain-free movements designed to restore and improve your hip’s flexibility. Ankle pumps‚ performed by pointing and flexing your feet‚ enhance circulation in your legs.
Gentle knee bends‚ within a comfortable range‚ help to mobilize the knee joint and surrounding muscles. Hip abduction‚ slowly moving your leg outwards‚ and adduction‚ bringing it back in‚ improve hip joint movement.
Perform heel slides‚ gliding your heel towards your buttocks‚ to increase hip flexion. These exercises should be completed slowly and deliberately‚ focusing on controlled motion rather than pushing through any discomfort.
Aim for 10-15 repetitions of each exercise‚ performing them smoothly and avoiding any bouncing or jerky movements. Remember to listen to your body and stop if you experience any pain.
Low-Impact Cardiovascular Warm-up
Following range of motion exercises‚ prepare your body for strengthening activities with a low-impact cardiovascular warm-up. Stationary cycling is an excellent option‚ starting with low resistance and a comfortable pace for 5-10 minutes.
Walking on a level surface‚ maintaining a moderate speed‚ is another effective choice. Ensure you use proper posture and avoid any limping.
Consider using an elliptical trainer‚ which provides a full-body workout with minimal impact on the hip joint.
The goal is to gently elevate your heart rate and increase blood flow to the muscles without placing excessive stress on the new hip. Monitor your body’s response and adjust the intensity accordingly.
Always prioritize comfort and avoid any activities that cause pain or discomfort during this warm-up phase.

Strengthening Exercises
Strengthening the muscles surrounding the hip is vital for stability and function post-replacement. Focus on gluteals‚ quadriceps‚ hamstrings‚ and hip abductors/adductors.
Gluteal Strengthening Exercises
Strengthening the gluteal muscles – encompassing the gluteus maximus‚ medius‚ and minimus – is paramount for hip stability‚ proper gait‚ and overall functional recovery after a hip replacement. These muscles play a critical role in extending and rotating the hip‚ as well as preventing the hip from dropping during weight-bearing activities.
Begin with gluteal sets‚ gently squeezing the buttock muscles and holding for five to ten seconds‚ repeating ten to fifteen times. Progress to side-lying hip abduction‚ lifting the leg while keeping the knee straight‚ again performing ten to fifteen repetitions on each side.
Bridging is an excellent exercise‚ lying on your back with knees bent and lifting your hips off the floor‚ squeezing your glutes at the top. Perform ten to fifteen repetitions. As strength improves‚ consider incorporating resistance bands around the thighs for added challenge. Always prioritize proper form to avoid strain.
Quadriceps Strengthening Exercises
Rebuilding quadriceps strength is essential for regaining knee extension‚ improving walking ability‚ and providing stability to the hip joint following a hip replacement. Weak quadriceps can contribute to instability and compensatory movement patterns.
Start with seated knee extensions‚ slowly straightening the leg while keeping the thigh supported‚ and then lowering it back down. Perform ten to fifteen repetitions on each leg. Progress to short arc quads‚ placing a rolled towel under the knee and performing extensions.
Standing quadriceps sets involve tightening the thigh muscles without moving the leg‚ holding for five to ten seconds‚ and repeating ten to fifteen times. As strength increases‚ consider adding ankle weights. Maintaining proper form and avoiding locking the knee are crucial for safe and effective exercise.
Hamstring Strengthening Exercises
Strengthening the hamstrings is vital for hip extension‚ controlling knee flexion‚ and overall lower limb stability after hip replacement surgery. Strong hamstrings work in synergy with the quadriceps to provide balanced leg function and support the hip joint.
Begin with prone hamstring curls‚ lying on your stomach and slowly bending your knee‚ bringing your heel towards your buttocks. Perform ten to fifteen repetitions on each leg. Resistance can be gradually increased using ankle weights or resistance bands.
Bridge exercises are also beneficial‚ lying on your back with knees bent and lifting your hips off the floor‚ squeezing your hamstrings and glutes. Hold for a few seconds and repeat ten to fifteen times. Focus on controlled movements and avoid arching your back excessively.
Hip Abductor and Adductor Exercises
Strengthening hip abductors and adductors is crucial for stabilizing the hip joint and restoring a normal gait pattern following hip replacement. These muscles control leg movement away from (abduction) and towards (adduction) the midline of the body.
Side-lying leg lifts target the abductors. Lie on your side with the operative leg on top‚ keeping it straight and lifting it slowly towards the ceiling. Repeat ten to fifteen times. Use ankle weights for added resistance as you progress.
Adductor squeezes with a ball between your knees are effective. Lie on your back with knees bent and squeeze a soft ball or pillow between your knees‚ holding for a few seconds. Repeat ten to fifteen times.
Focus on controlled movements and avoid pain during these exercises.

Stretching Exercises
Regular stretching improves hip flexibility and range of motion post-replacement‚ reducing stiffness and enhancing overall function. Gentle stretches are key to recovery.
Hip Flexor Stretches
Hip flexor tightness is common after hip replacement‚ limiting range of motion. A basic hip flexor stretch involves kneeling on one leg‚ with the other foot forward at a 90-degree angle.
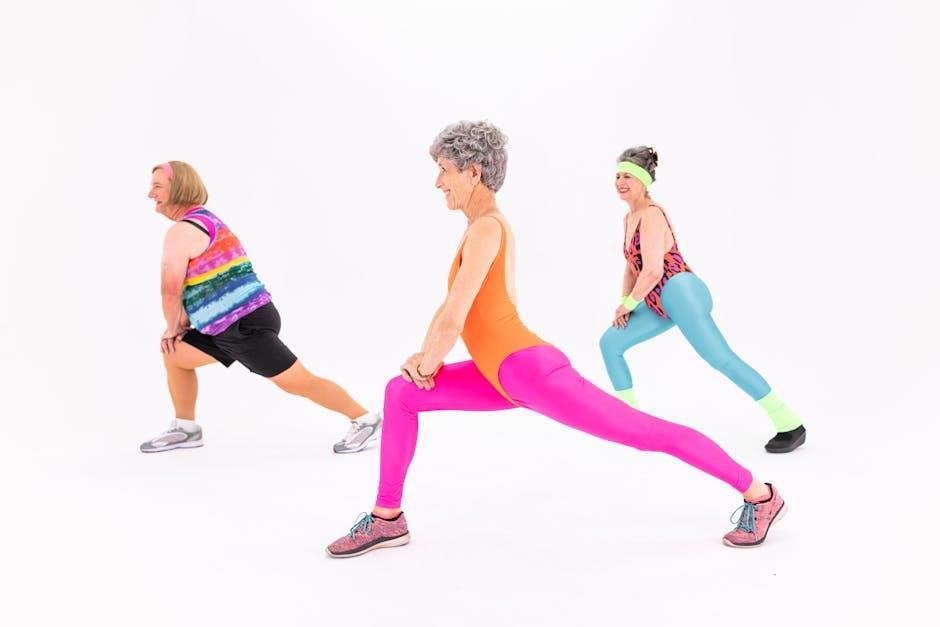
Gently lean forward‚ keeping your back straight‚ until you feel a stretch in the front of your hip. Avoid arching your lower back. Hold the stretch for 20-30 seconds‚ repeating 2-3 times.
Another variation includes performing the stretch while standing‚ using a chair for balance if needed. Ensure the movement is controlled and pain-free. Consistent hip flexor stretching helps restore proper hip alignment and improves walking mechanics‚ contributing to a more comfortable and functional recovery process.
Always consult your physiotherapist for personalized guidance.
Piriformis Stretch
The piriformis muscle‚ located deep in the buttock‚ can sometimes compress the sciatic nerve after hip replacement‚ causing pain. Stretching this muscle is vital for relieving discomfort and improving hip function.
A common stretch involves lying on your back with knees bent and feet flat. Cross the affected leg over the opposite knee. Gently pull the uncrossed thigh towards your chest until you feel a stretch in your buttock.
Alternatively‚ while seated‚ cross the affected leg over the opposite knee and lean forward‚ keeping your back straight. Hold each stretch for 20-30 seconds‚ repeating 2-3 times. This stretch should be performed cautiously and stopped if pain increases.
Regular stretching aids in nerve decompression and improved mobility.
Hamstring Stretches
Maintaining flexibility in the hamstrings is essential post-hip replacement‚ as tightness can impact hip movement and contribute to lower back pain. Several stretches can effectively target these muscles.
One method involves lying on your back with one leg bent and the other extended towards the ceiling. Gently pull the extended leg towards you‚ keeping your knee slightly bent to avoid overstretching.
Another option is the seated hamstring stretch: sit with legs extended and reach towards your toes‚ keeping your back as straight as possible. Hold each stretch for 20-30 seconds‚ repeating 2-3 times.
Remember to perform these stretches slowly and avoid bouncing‚ focusing on a gentle‚ sustained stretch.

Balance and Proprioception Exercises
Improving balance and proprioception – your body’s awareness in space – is vital after hip replacement for stability and preventing falls during daily activities.
Single Leg Stance
The single leg stance exercise is a foundational component of regaining balance and proprioception post-hip replacement. Begin by standing near a stable surface‚ like a counter or sturdy chair‚ for support. Gently lift the leg opposite your operated hip‚ bending your knee.
Maintain this position for as long as you can‚ aiming for 30 seconds‚ while focusing on keeping your hips level and avoiding leaning to one side. Repeat 3-5 times on each leg.
As your balance improves‚ gradually reduce your reliance on the support surface. Progress by performing the exercise with your eyes closed (only if you feel confident and safe) to further challenge your balance. Remember to prioritize safety and stop if you experience any pain or instability.
Weight Shifting Exercises
Weight shifting exercises are excellent for improving balance and stability after a hip replacement‚ enhancing proprioception and control. Stand with your feet shoulder-width apart‚ maintaining a slight bend in your knees. Gently shift your weight from side to side‚ and then forward and backward.
Focus on maintaining a controlled movement‚ keeping your core engaged and your back straight. As you become more comfortable‚ increase the range of motion and speed of the shifts.
Repeat this exercise for 10-15 repetitions in each direction. You can also perform this exercise while standing on a slightly unstable surface‚ like a foam pad‚ to further challenge your balance. Always prioritize safety and stop if you feel any pain.

Advanced Exercises (with Physiotherapist Approval)
Progressing to advanced exercises‚ like step-ups and mini-squats‚ requires your physiotherapist’s approval‚ ensuring proper form and preventing injury during recovery.
Step-Ups
Step-ups are an excellent exercise to build strength and endurance in the glutes‚ quadriceps‚ and hamstrings‚ crucial for functional movements post-hip replacement. Begin with a low step – approximately 4-6 inches – and gradually increase the height as your strength improves.
Ensure the step is stable and non-slip. Lead with your operated leg‚ focusing on controlled movement. Avoid twisting your hip during the step-up. Maintain a straight back and engage your core throughout the exercise. Slowly lower yourself back down‚ controlling the descent.
Start with 10-12 repetitions on each leg‚ completing 2-3 sets. Listen to your body and stop if you experience any pain. Proper form is paramount; consult your physiotherapist for guidance and progression.
Mini-Squats
Mini-squats are a modified squat designed to strengthen the quadriceps‚ glutes‚ and hamstrings without placing excessive stress on the hip joint post-replacement. Stand with your feet shoulder-width apart‚ and gently bend your knees as if you’re about to sit in a chair.
Keep your back straight‚ core engaged‚ and chest up throughout the movement. Only lower yourself a few inches – a “mini” squat – avoiding any pain or discomfort. Focus on maintaining good form and controlled motion.
Begin with 10-12 repetitions‚ completing 2-3 sets. As your strength increases‚ you can gradually increase the depth of the squat‚ but always within a comfortable range. Regular practice will improve lower body strength and functional ability.

Maintaining a Home Exercise Program
Consistent home exercise is vital for long-term hip replacement success‚ maintaining strength and mobility. Aim for two to three sessions weekly‚ following your physiotherapist’s guidance.
Frequency and Duration
Establishing a regular exercise schedule is paramount for sustained recovery after a hip replacement. Ideally‚ aim to perform your home exercise program two to three times per week. This frequency allows for adequate muscle recovery between sessions while consistently reinforcing strength and flexibility gains.
Each exercise session should last approximately 30 to 45 minutes. This duration provides sufficient time to complete a comprehensive set of exercises targeting various muscle groups around the hip joint. Begin with a 5-10 minute warm-up‚ followed by strengthening‚ stretching‚ and balance exercises.
Remember to listen to your body and adjust the duration or intensity as needed. If you experience increased pain or swelling‚ reduce the duration or consult with your physiotherapist. Consistency is key; even shorter‚ more frequent sessions are beneficial if they fit better into your lifestyle.
Importance of Consistency
Maintaining a consistent exercise routine is arguably the most vital aspect of long-term success following hip replacement surgery. While initial progress may be rapid‚ sustained improvements rely heavily on regular participation in your home exercise program.
Consistent exercise prevents muscle weakness and stiffness from returning‚ preserving the gains achieved during formal rehabilitation. It also contributes to overall health and well-being‚ enabling you to return to a more active and fulfilling lifestyle.
Think of exercise as a maintenance task‚ similar to regular check-ups for your car. Even when you feel good‚ continued effort is necessary to prevent setbacks. Incorporate exercises into your daily or weekly schedule‚ treating them as non-negotiable appointments.

Potential Complications and Precautions
While exercise is beneficial‚ awareness of potential complications is crucial. Discomfort is expected‚ but sharp‚ persistent pain warrants immediate medical attention. Monitor for signs of infection‚ such as increased redness‚ swelling‚ or drainage from the incision site.
Be mindful of hip precautions advised by your surgeon‚ as these vary based on the surgical approach. Avoid excessive bending‚ twisting‚ or crossing your legs‚ as these movements could increase dislocation risk.
Fatigue is common‚ so listen to your body and rest when needed; Ensure proper form during exercises to prevent strain or injury. Frequent follow-up appointments are essential to monitor progress and address any concerns promptly.