audio technica at lp60 usb manual
The Audio-Technica AT-LP60-USB is a fully automatic belt-drive turntable designed for both vinyl enthusiasts and newcomers․ It features a built-in phono preamp, USB output for digital recording, and includes Audacity software for easy vinyl-to-digital transfers․ With its compact design and user-friendly operation, it offers high-quality playback and versatility for connecting to stereo systems or computers․ Perfect for preserving classic LP collections or enjoying analog sound with modern convenience․
1․1 Overview of the AT-LP60-USB Turntable
The Audio-Technica AT-LP60-USB is a fully automatic belt-drive turntable designed for easy vinyl playback and digital recording․ It features a built-in phono preamp, USB output for computer connection, and comes with Audacity software for Mac and PC․ The turntable supports 33 1/3 and 45 RPM speeds, includes a dual-magnet cartridge, and offers a compact, portable design with intuitive controls for both newcomers and enthusiasts․
1․2 Key Features and Benefits
The Audio-Technica AT-LP60-USB offers a built-in phono preamp, USB connectivity for direct computer recording, and a dual-magnet cartridge․ It plays both 33 1/3 and 45 RPM records, features fully automatic operation, and includes Audacity software․ The turntable’s compact design, easy setup, and high-quality audio make it ideal for both beginners and experienced vinyl listeners, ensuring a seamless transition from analog to digital formats․
System Requirements and Compatibility
The Audio-Technica AT-LP60-USB is compatible with Mac OS X 10․1 and Windows 98, requiring no additional drivers․ It connects via USB to any computer, ensuring easy digital recording and playback․ Its versatile design supports both USB and analog interfaces, making it compatible with a wide range of systems and setups for seamless integration․
2․1 Operating System Compatibility
The Audio-Technica AT-LP60-USB is compatible with a wide range of operating systems, including Mac OS X 10․1 and Windows 98․ This broad compatibility ensures that users can easily connect the turntable to their preferred devices without requiring additional drivers․ The turntable’s USB interface allows for seamless integration with both older and newer systems, making it a versatile choice for various setups․
2․2 Hardware Requirements for USB Connection
For a USB connection, the Audio-Technica AT-LP60-USB requires a computer with a USB 1․0 or higher port․ It includes a USB cable for direct connection, eliminating the need for additional drivers․ The turntable is compatible with both Mac and PC systems and operates seamlessly with Audacity recording software․ No extra hardware is needed beyond the provided accessories for a reliable USB setup․
Installation and Assembly
Installation involves placing the platter on the spindle, looping the belt over the pulley, and positioning the mat․ Connect the USB cable and power supply, then refer to the manual for detailed assembly steps․
3․1 Unpacking and Initial Setup
Begin by carefully unpacking the AT-LP60-USB, ensuring all components are included and undamaged․ Place the turntable on a stable surface, then install the platter on the spindle․ Loop the belt over the motor pulley, ensuring it’s properly aligned and untwisted․ Place the felt mat on the platter․ Connect the USB cable and power supply, then refer to the manual for detailed setup instructions․
3․2 Placing the Turntable Platter and Belt
Align the turntable platter with the center spindle, ensuring it is fully seated․ Carefully pull the red tape ribbon attached to the belt and loop it over the motor pulley․ Make sure the belt is not twisted and is properly positioned around the pulley․ This ensures smooth rotation and proper speed control․ Proper alignment is crucial for optimal performance․
3․3 Connecting the USB Cable and Power Supply
Plug the USB cable into the turntable’s USB port, located on the back, and connect the other end to your computer for digital recording․ Attach the provided AC adapter to the power input, ensuring it’s securely connected to a 120V, 60Hz outlet․ Turn on the turntable and verify the power indicator lights up․ Install the included Audacity software to enable recording․ Test the setup by playing a record to confirm proper functionality․

Operating the Turntable
The Audio-Technica AT-LP60-USB offers fully automatic operation, supporting 33 1/3 and 45 RPM speeds․ Its built-in phono preamp and USB interface provide versatility for both analog and digital connections, ensuring seamless integration with stereo systems or computers for high-quality vinyl playback and recording․
4․1 Basic Controls and Functions
The Audio-Technica AT-LP60-USB features a user-friendly design with essential controls for smooth operation․ The turntable includes a start/stop button, a tonearm lift, and a speed selector for switching between 33 1/3 and 45 RPM․ The motor is belt-driven, ensuring consistent rotation, while the platter and mat provide a stable surface for records․ A hinged dust cover protects the turntable when not in use, and the included USB cable enables easy digital recording via Audacity software․
4․2 Playing Records at 33 1/3 and 45 RPM
To play records at 33 1/3 RPM, place the record on the platter and position the tonearm․ For 45 RPM, lift the tonearm, move it right, and switch the speed selector․ Gently lower the tonearm onto the record groove․ The belt-driven motor ensures smooth rotation, while the speed indicator confirms the selected RPM․ This feature allows seamless playback of both LPs and singles with optimal sound quality and control․
4․3 Switching Between Phono and Line Output
Locate the Pre-amp Selector Switch on the back of the turntable․ For systems with a PHONO input, set the switch to PHONO․ For systems without PHONO input, set it to LINE․ This ensures proper signal level matching․ The USB connection is unaffected by this switch, allowing simultaneous digital and analog setups․ This feature enhances compatibility with various audio systems while maintaining sound quality․
Connecting to a Computer via USB
The AT-LP60-USB features a USB output for direct computer connection, enabling easy vinyl-to-digital transfers․ Includes Audacity software for recording and a built-in phono preamp for clear audio․
5․1 Step-by-Step USB Connection Guide
Assemble the turntable by placing the platter on the spindle and securing the belt over the motor pulley; 2․ Connect the USB cable to the turntable and your computer․ 3․ Install Audacity software from the included CD or download it online․ 4․ Open Audacity, select the AT-LP60-USB as the input device, and begin recording․ Ensure the belt is properly aligned for smooth operation․
5․2 Configuring Software for USB Recording
Install the included Audacity software or download it from the official website․ 2․ Open Audacity and select “AT-LP60-USB” as the recording device in preferences․ 3․ Set the recording level to 0․5-0․7 for optimal audio quality․ 4․ Choose your preferred file format (WAV or MP3)․ 5․ Click “Record” and start playing your vinyl to capture the audio digitally․ Ensure proper USB connection before starting․
Troubleshooting Common Issues
Address common issues like no sound, USB recognition problems, or speed adjustments․ Check connections, restart devices, and ensure proper software settings for optimal performance and functionality․
6․1 No Sound from the Turntable
If the AT-LP60-USB produces no sound, check the USB connection, ensure the volume is not muted, and verify the pre-amp switch is set correctly․ Test with different cables or ports, and confirm software settings recognize the turntable․ Restarting devices or updating drivers may also resolve the issue․ Ensure proper phono/line output settings for your stereo system connection․
6․2 Turntable Not Recognized by Computer
If the AT-LP60-USB isn’t recognized by your computer, ensure the USB cable is securely connected to both the turntable and the computer․ Try a different USB port or restart your computer․ Check for driver updates and ensure the operating system is compatible․ If issues persist, test the turntable on another computer to determine if the problem lies with the device or the computer itself․
6․3 Adjusting Speed and Pre-Amp Settings
To adjust the speed on the AT-LP60-USB, locate the Speed Selector Switch and slide it to 33 or 45 RPM․ For pre-amp settings, use the Phono/Line switch on the rear․ Set to PHONO if your system has a dedicated phono input, or LINE for direct connection to amplifiers or receivers without a phono input․ Ensure the switch is secure to maintain optimal sound quality and proper functionality․
Using the Built-In Phono Preamp
The AT-LP60-USB features a built-in phono preamp, eliminating the need for an external preamplifier․ This allows direct connection to amplifiers or receivers without a dedicated phono input, ensuring versatile compatibility and simplified setup for high-quality vinyl playback․
7․1 Understanding Phono and Line Level Output
Phono output requires a preamp to boost low-level signals, while line level output is stronger and ready for direct connection to amplifiers or receivers․ The AT-LP60-USB includes a built-in preamp, allowing users to switch between phono and line modes․ This feature ensures compatibility with various audio systems, making it easy to connect the turntable to different setups without additional equipment․
7․2 Connecting to a Stereo System
To connect the AT-LP60-USB to a stereo system, use the RCA output cables․ If your system has a PHONO input, set the turntable’s pre-amp switch to PHONO․ For systems without PHONO input, switch to LINE․ The turntable’s built-in preamp ensures proper signal levels․ Connect the RCA cables to the appropriate input on your stereo system, and enjoy high-quality vinyl playback through your speakers․
Recording Vinyl to Digital
The AT-LP60-USB simplifies vinyl-to-digital transfers with its USB output and included Audacity software․ Connect directly to your computer, record, and preserve your vinyl collection with ease and clarity․
8․1 Software Recommendations
For recording vinyl, the AT-LP60-USB includes Audacity, a free, user-friendly software compatible with Mac and PC․ It allows easy recording, editing, and exporting of digital files․ For advanced users, alternatives like Adobe Audition or specialized DAWs can be used․ Ensure the software recognizes the turntable as the input device for seamless recording․ Always refer to the included guide for software setup instructions․
8․2 Best Practices for Digital Transfer
For optimal digital transfers, ensure records are clean and free of dust․ Use the included Audacity software or alternative recording tools․ Record in a quiet environment and select the correct RPM for your record․ Save files in high-quality formats like WAV or FLAC․ Normalize volumes and edit tracks post-recording for best results․ Always preview recordings to ensure clarity and adjust settings as needed․

Maintenance and Care
Regularly clean the turntable platter, mat, and stylus to ensure optimal performance․ Replace the stylus every 400-500 hours and the belt as needed․ Dust cover helps prevent debris buildup․
9․1 Cleaning the Turntable and Stylus
Clean the turntable platter and mat regularly using a soft, dry cloth․ For tougher dirt, lightly dampen the cloth with distilled water, but avoid harsh chemicals․ Gently wipe in a circular motion to remove dust and debris․
Use a stylus cleaning brush or solution to remove dust from the needle․ Avoid touching the stylus tip to prevent damage․ Regular cleaning ensures optimal sound quality and prolongs the life of your turntable and cartridge․
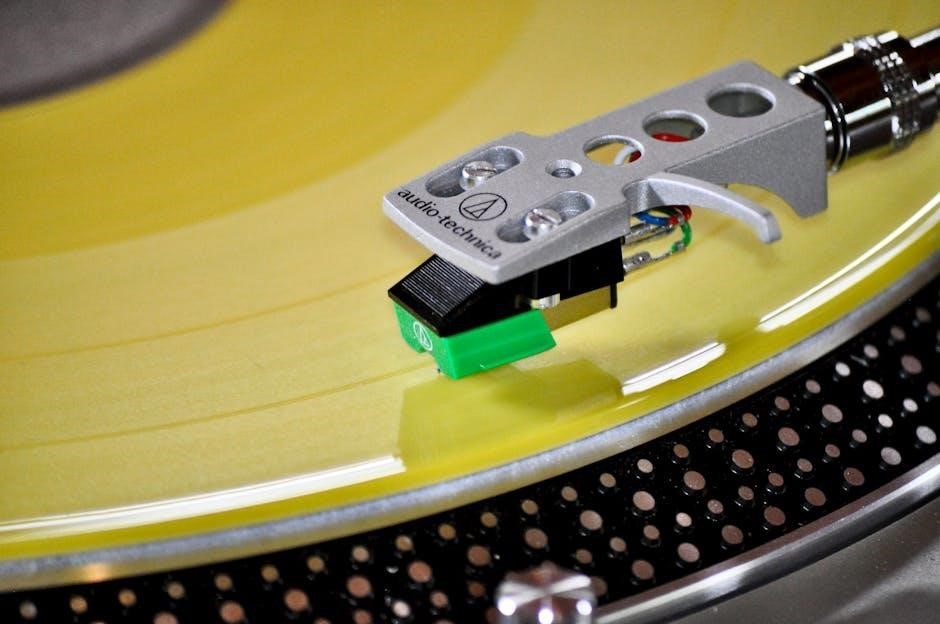
9․2 Replacing the Stylus and Belt
To replace the stylus, use the ATN3600L replacement cartridge․ Gently remove the old stylus and insert the new one, ensuring proper alignment․ For the belt, locate the red ribbed belt under the platter․ Carefully remove and replace it with a new one, ensuring it fits securely around the motor pulley․ Regular replacement ensures optimal performance and sound quality․

Technical Specifications
The Audio-Technica AT-LP60-USB measures 360 x 356 x 97․5 mm and weighs 3000 grams․ It features a signal-to-noise ratio of 50 dB and a frequency response of 20 Hz to 20 kHz, ensuring clear and balanced audio reproduction․
10․1 Product Dimensions and Weight
The Audio-Technica AT-LP60-USB measures 360 mm (width) x 356 mm (depth) x 97․5 mm (height) and weighs approximately 3000 grams․ Its compact and lightweight design makes it easy to place on shelves or desks, ensuring it fits seamlessly into various home or office setups without occupying excessive space․
10․2 Signal-to-Noise Ratio and Frequency Response
The Audio-Technica AT-LP60-USB boasts a Signal-to-Noise Ratio (SNR) of 50 dB, ensuring clear playback with minimal background noise․ Its frequency response ranges from 20 Hz to 20 kHz, delivering accurate sound reproduction across the audible spectrum․ These specifications highlight its ability to provide high-quality audio performance, making it ideal for both casual listening and digital recording applications․

Warranty and Support
The Audio-Technica AT-LP60-USB is backed by a one-year warranty․ For support, contact Audio-Technica through their official website or consult the provided customer service information․
11․1 Warranty Information
The Audio-Technica AT-LP60-USB is covered by a one-year limited warranty from the date of purchase․ This warranty covers manufacturing defects in materials and workmanship․ For warranty claims, contact Audio-Technica’s customer service or visit their official website for detailed information․ Proper registration and original purchase documentation are required for warranty processing․
11․2 Contacting Audio-Technica Support
For assistance with the AT-LP60-USB, visit the official Audio-Technica website or contact their support team․ Phone support is available at 1-330-686-2600, Monday–Friday, 8:30 AM–5:30 PM ET․ Email inquiries can be sent via the support form on their website․ Additional resources, including FAQs and troubleshooting guides, are also available online to help resolve common issues quickly and effectively․

Additional Resources
The official Audio-Technica website offers a downloadable manual, software guides, and FAQs․ Online forums and communities provide additional support and troubleshooting tips for AT-LP60-USB users․
12․1 Downloading the Full Manual
The Audio-Technica AT-LP60-USB manual is available for download on the official Audio-Technica website and platforms like ManualsLib․ The 24-page manual includes detailed installation, operation, and troubleshooting guides․ It also covers software setup and vinyl-to-digital recording instructions․ The manual is provided in English, French, and Spanish, ensuring accessibility for users worldwide․ Downloading the full manual is essential for optimal use and troubleshooting of the turntable․
12․2 Online Communities and Forums
Online communities like Reddit’s r/vinyl and Audio-Technica’s official forums offer extensive support for AT-LP60-USB users․ These platforms provide troubleshooting tips, setup guides, and mods shared by experienced users․ You can also find discussions on vinyl recording, software recommendations, and maintenance advice, making them invaluable resources for optimizing your turntable experience and resolving common issues with expert and peer support․
The Audio-Technica AT-LP60-USB is a versatile, user-friendly turntable ideal for both beginners and experienced users, offering seamless vinyl-to-digital transfers and high-quality analog playback with modern convenience․
13․1 Final Tips for Optimal Performance
For the best experience with your Audio-Technica AT-LP60-USB, regularly clean the stylus and turntable, ensure proper speed selection for your records, and maintain a stable USB connection․ Keep the area dust-free, store records upright, and avoid overloading the tonearm․ Use high-quality RCA cables and update your software for optimal digital transfers․ Proper care and setup will enhance sound quality and extend the life of your turntable․